Verify Meta Business
You may need to verify your business in Meta Business Suite to access certain advertising, developer, billing, or spending options. Business verification is different from Meta Verified for businesses — verifying your business does not give a verified badge.
- You can only start verification if your business portfolio is eligible.
- You must have full control of the business portfolio.
- Providing false or misleading information, attempting to verify a business you are not authorised to represent, or trying to bypass Meta's review process may result in:
- Verification being blocked
- Verified status being removed
- Additional actions taken on the account
Setup Guide
Follow these steps to verify your business in Meta Business Suite:
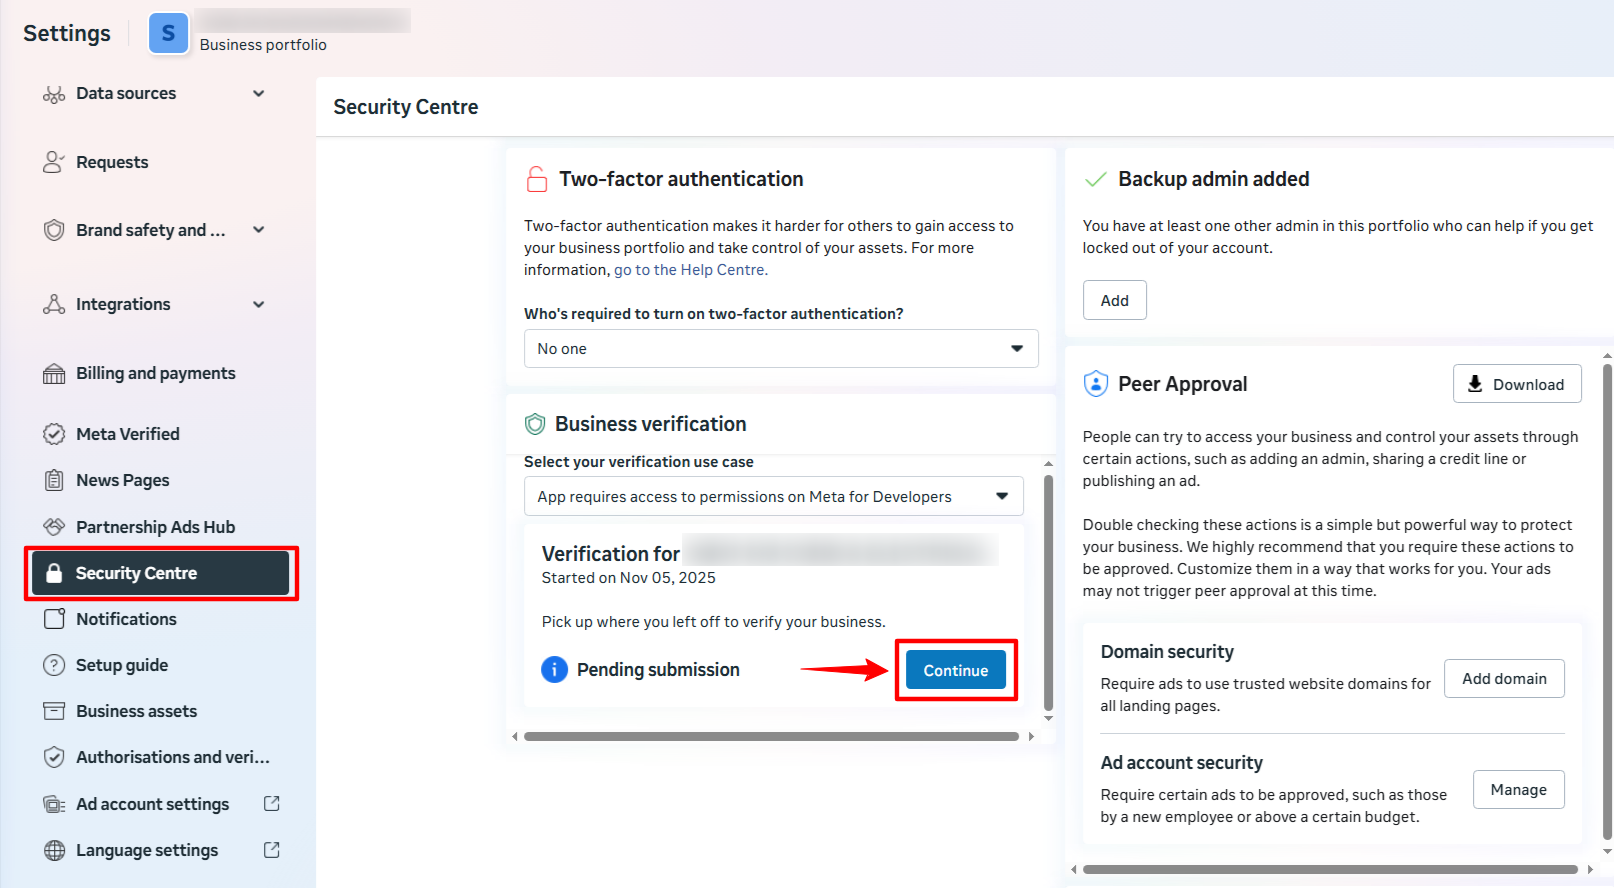
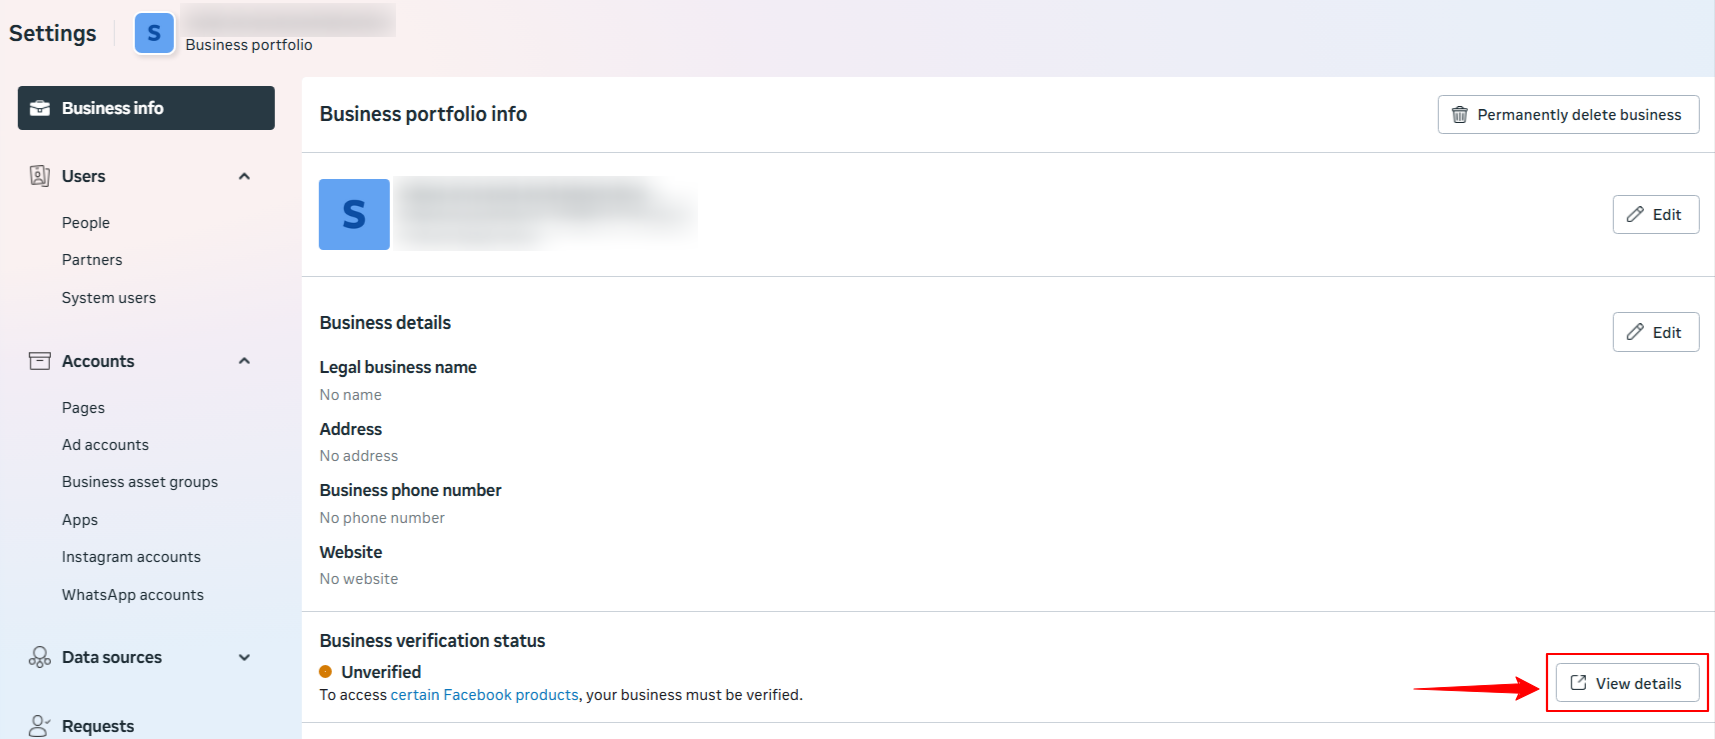
Step 1: Go to Security Centre
Go to Security Centre in Meta Business Suite or, from Business Info, under "Business verification status".
If you cannot access this, you may not have full control of the business portfolio.
Step 2: Start Verification
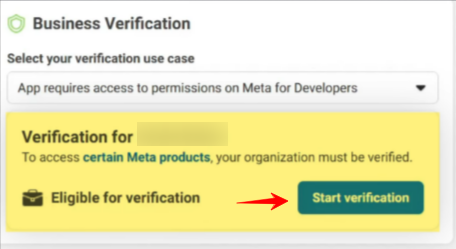
Click Start verification.
If you see Ineligible for verification, it means verification isn't required at this time. This happens because you haven't created any apps yet in Meta Business Suite under Accounts.
Step 3: Get Started
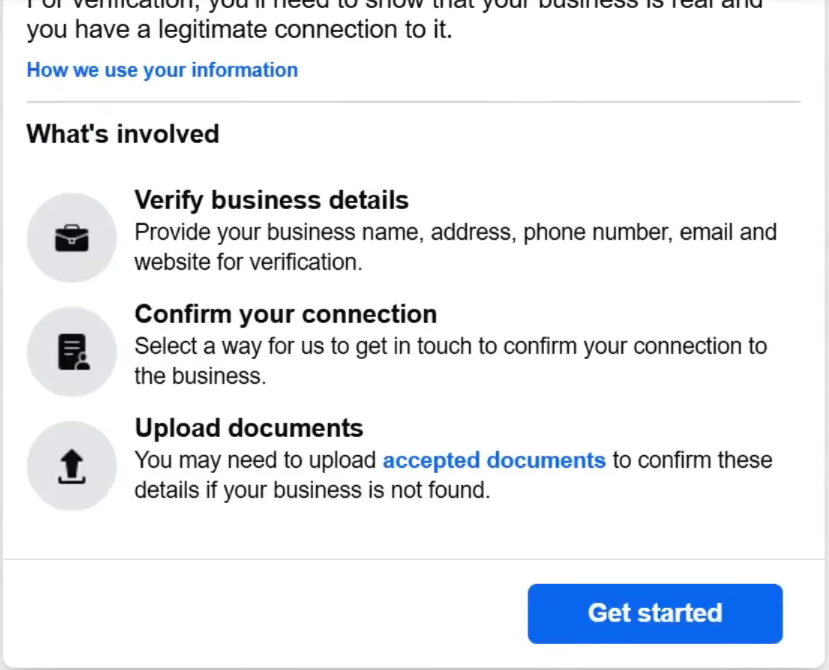
Click Get started.
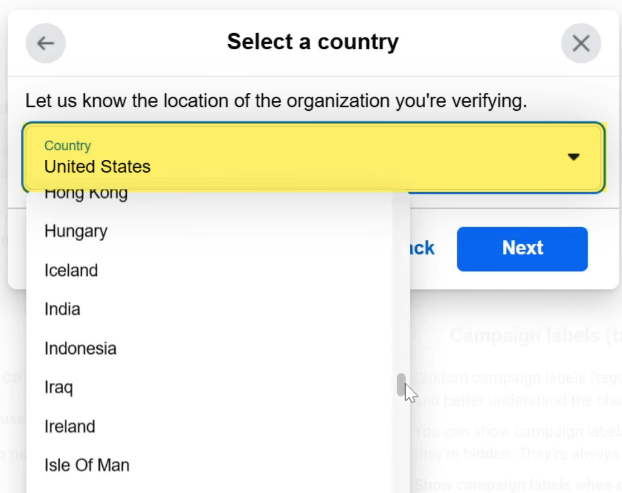
Step 4: Select Country
Select your country and click Next.
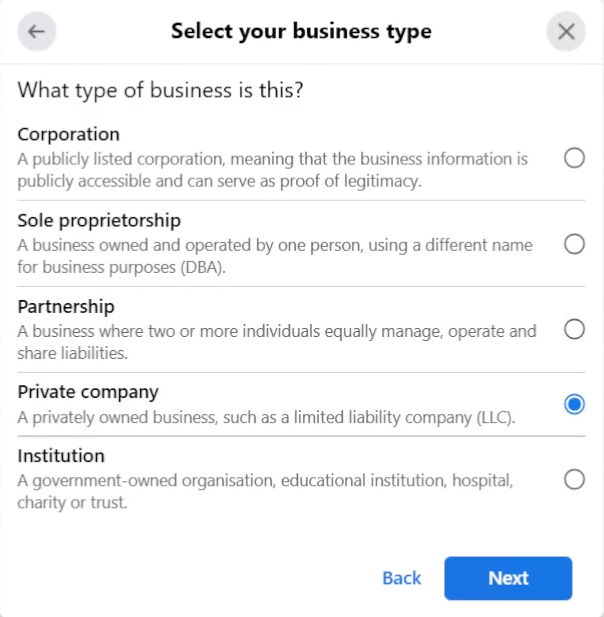
Step 5: Choose Business Type
Choose the business type that matches how your business is registered, then click Next.
For Malaysian companies, the business type is typically registered under Sdn Bhd (Sendirian Berhad).
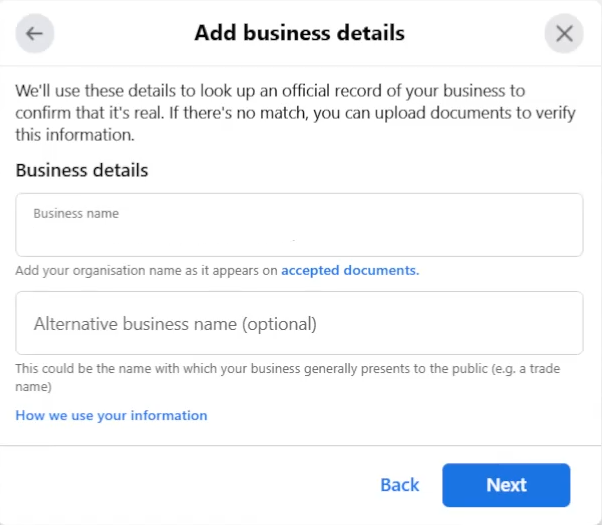
Step 6: Enter Business Details
Enter your business details:
-
Legal Business Name: Enter the name exactly as stated in your SSM document, then click Next.
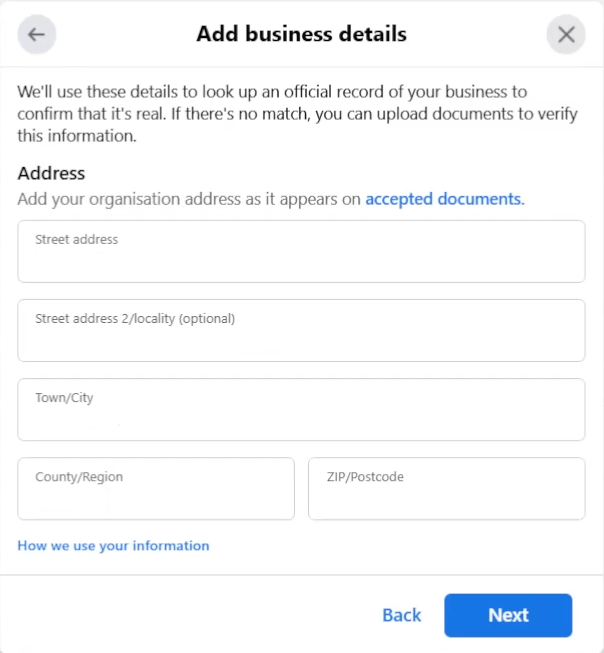
-
Business Address: Fill in your business address as mentioned in your SSM document, then click Next.
-
Phone Number & Website: Enter your business phone number and company website, and click Next.
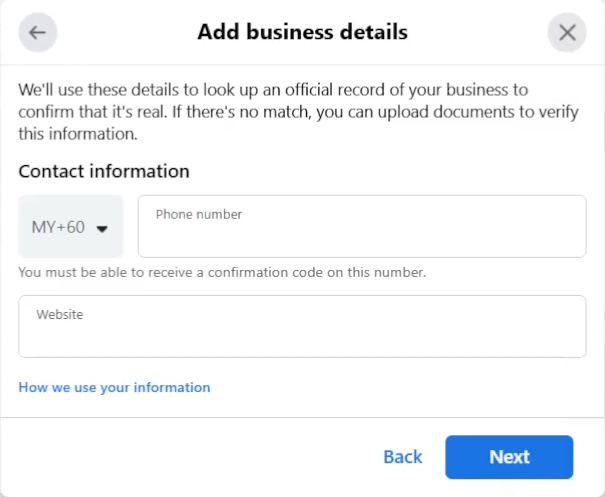
Make sure all details exactly match your legal business entity and that the website loads and is HTTPS-compliant.
Step 7: Confirm Business Details
Select the business record that exactly matches your business details, such as business address, phone number, and company website.
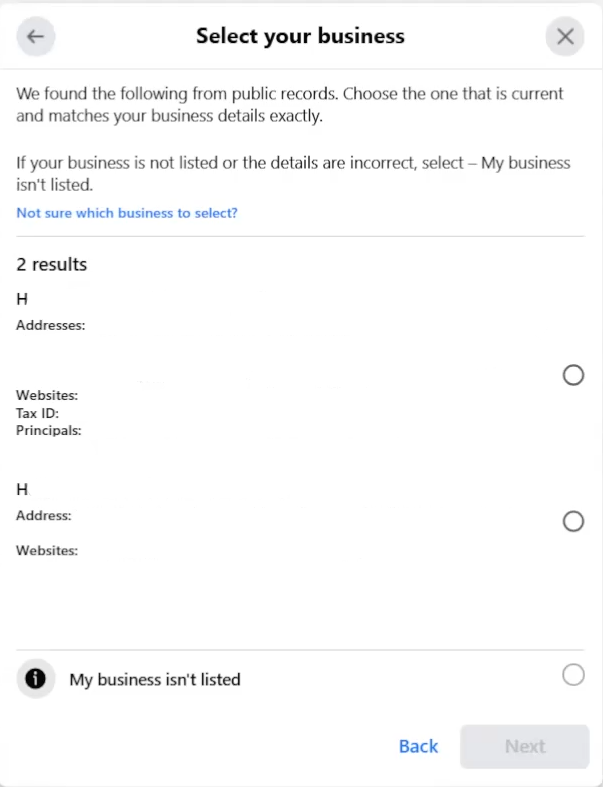
- If no matching record is found, select My business isn't listed or None of these match.
- You may be asked to upload official documents (for example, business licence or articles of incorporation) to confirm the details provided.
Step 8: Choose Verification Method
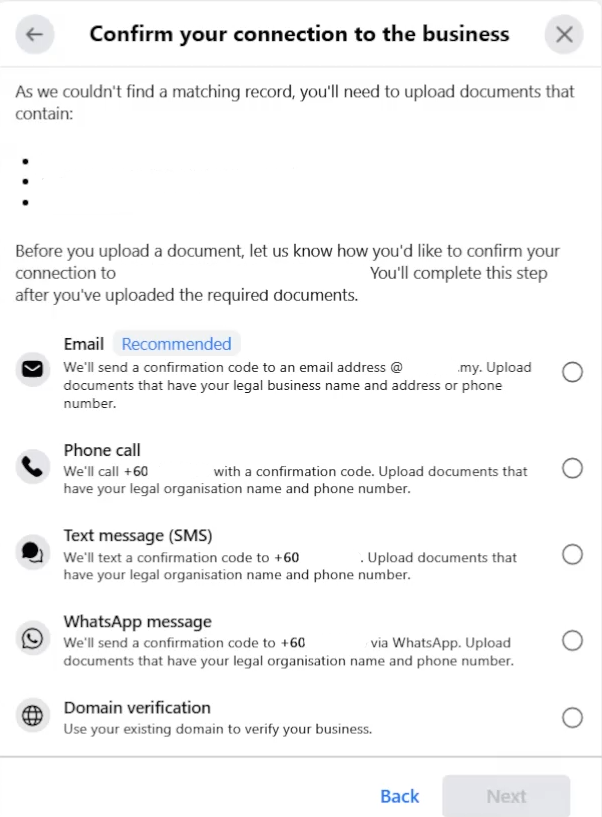
Choose a verification method:
- Phone
- Text message
- WhatsApp message
- Domain verification
If you choose Email as your verification method, the email address must be on the same domain as your business website (e.g., [email protected]).
Step 9: Upload Documents
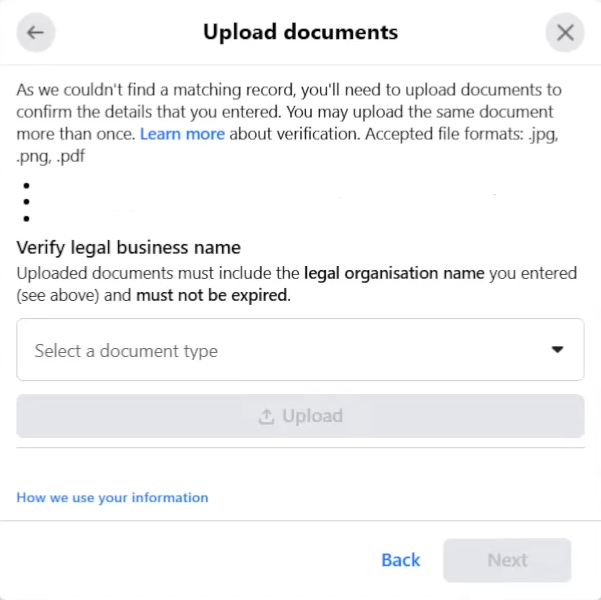
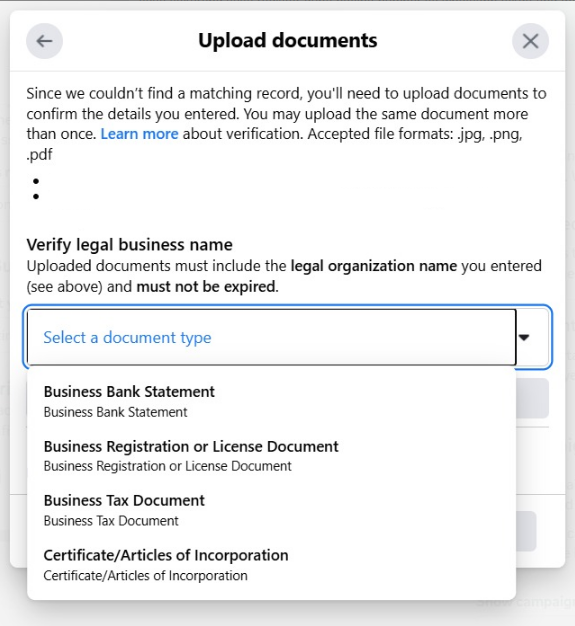
The process will prompt you to upload the required documents. For SSM document submission, select business registration or license document and click Upload.
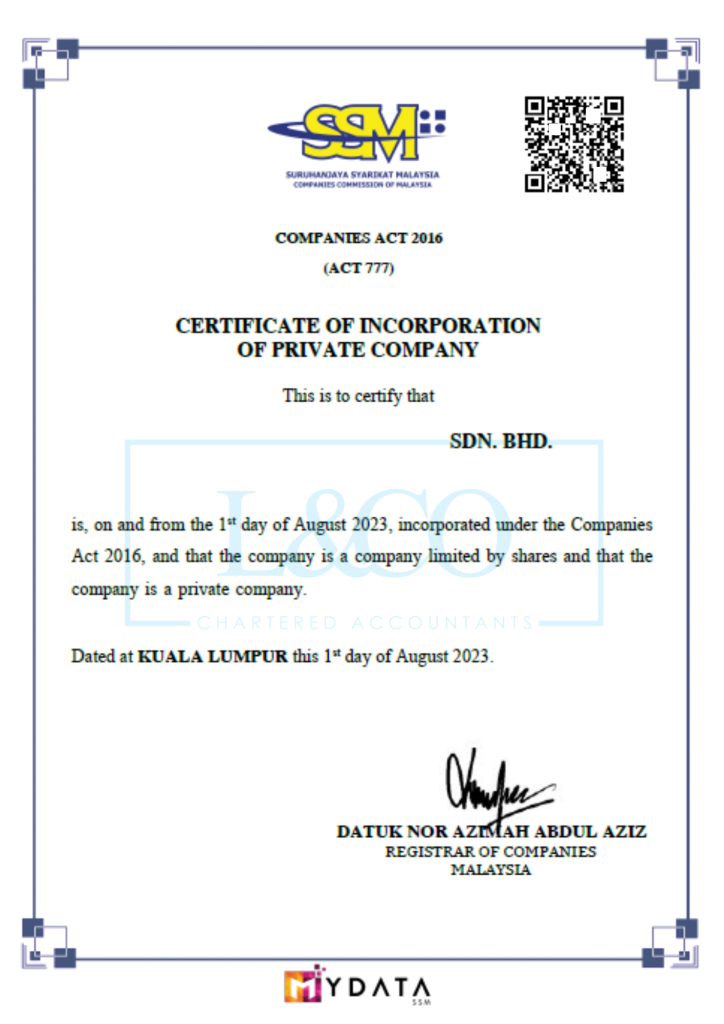
Below is an example of an SSM (Suruhanjaya Syarikat Malaysia) document. Make sure the business name and address on your SSM document exactly match what you entered in Step 6.
Step 10: Phone Number on Document
After uploading the document, you'll be asked whether the document includes your business phone number.
Select No.
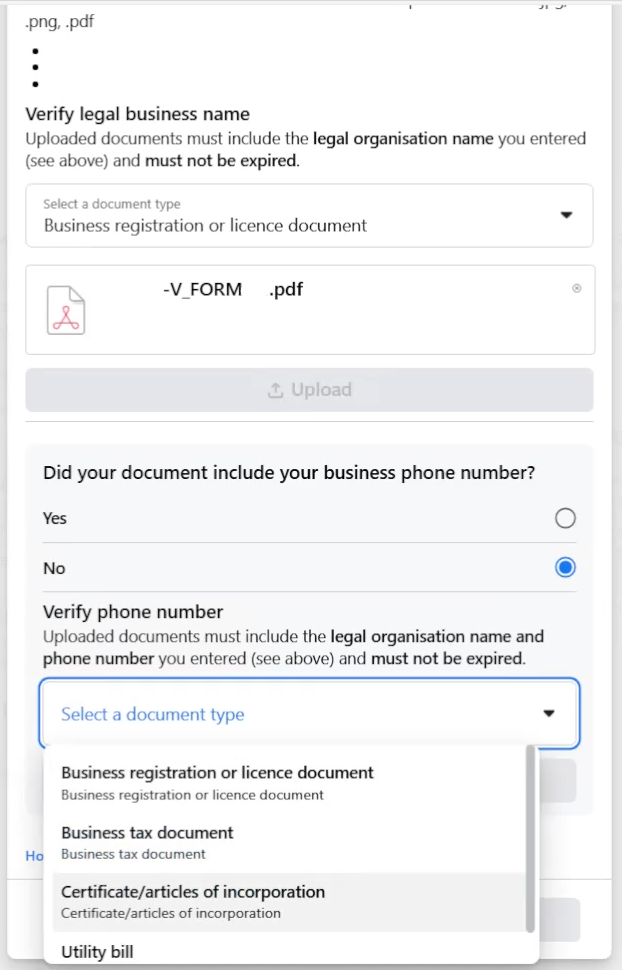
SSM documents for Malaysian companies do not include a business phone number. You must upload a supporting document that proves the phone number registered to your business.
- Select Utility Bill (telco or internet bill) as the supporting document.
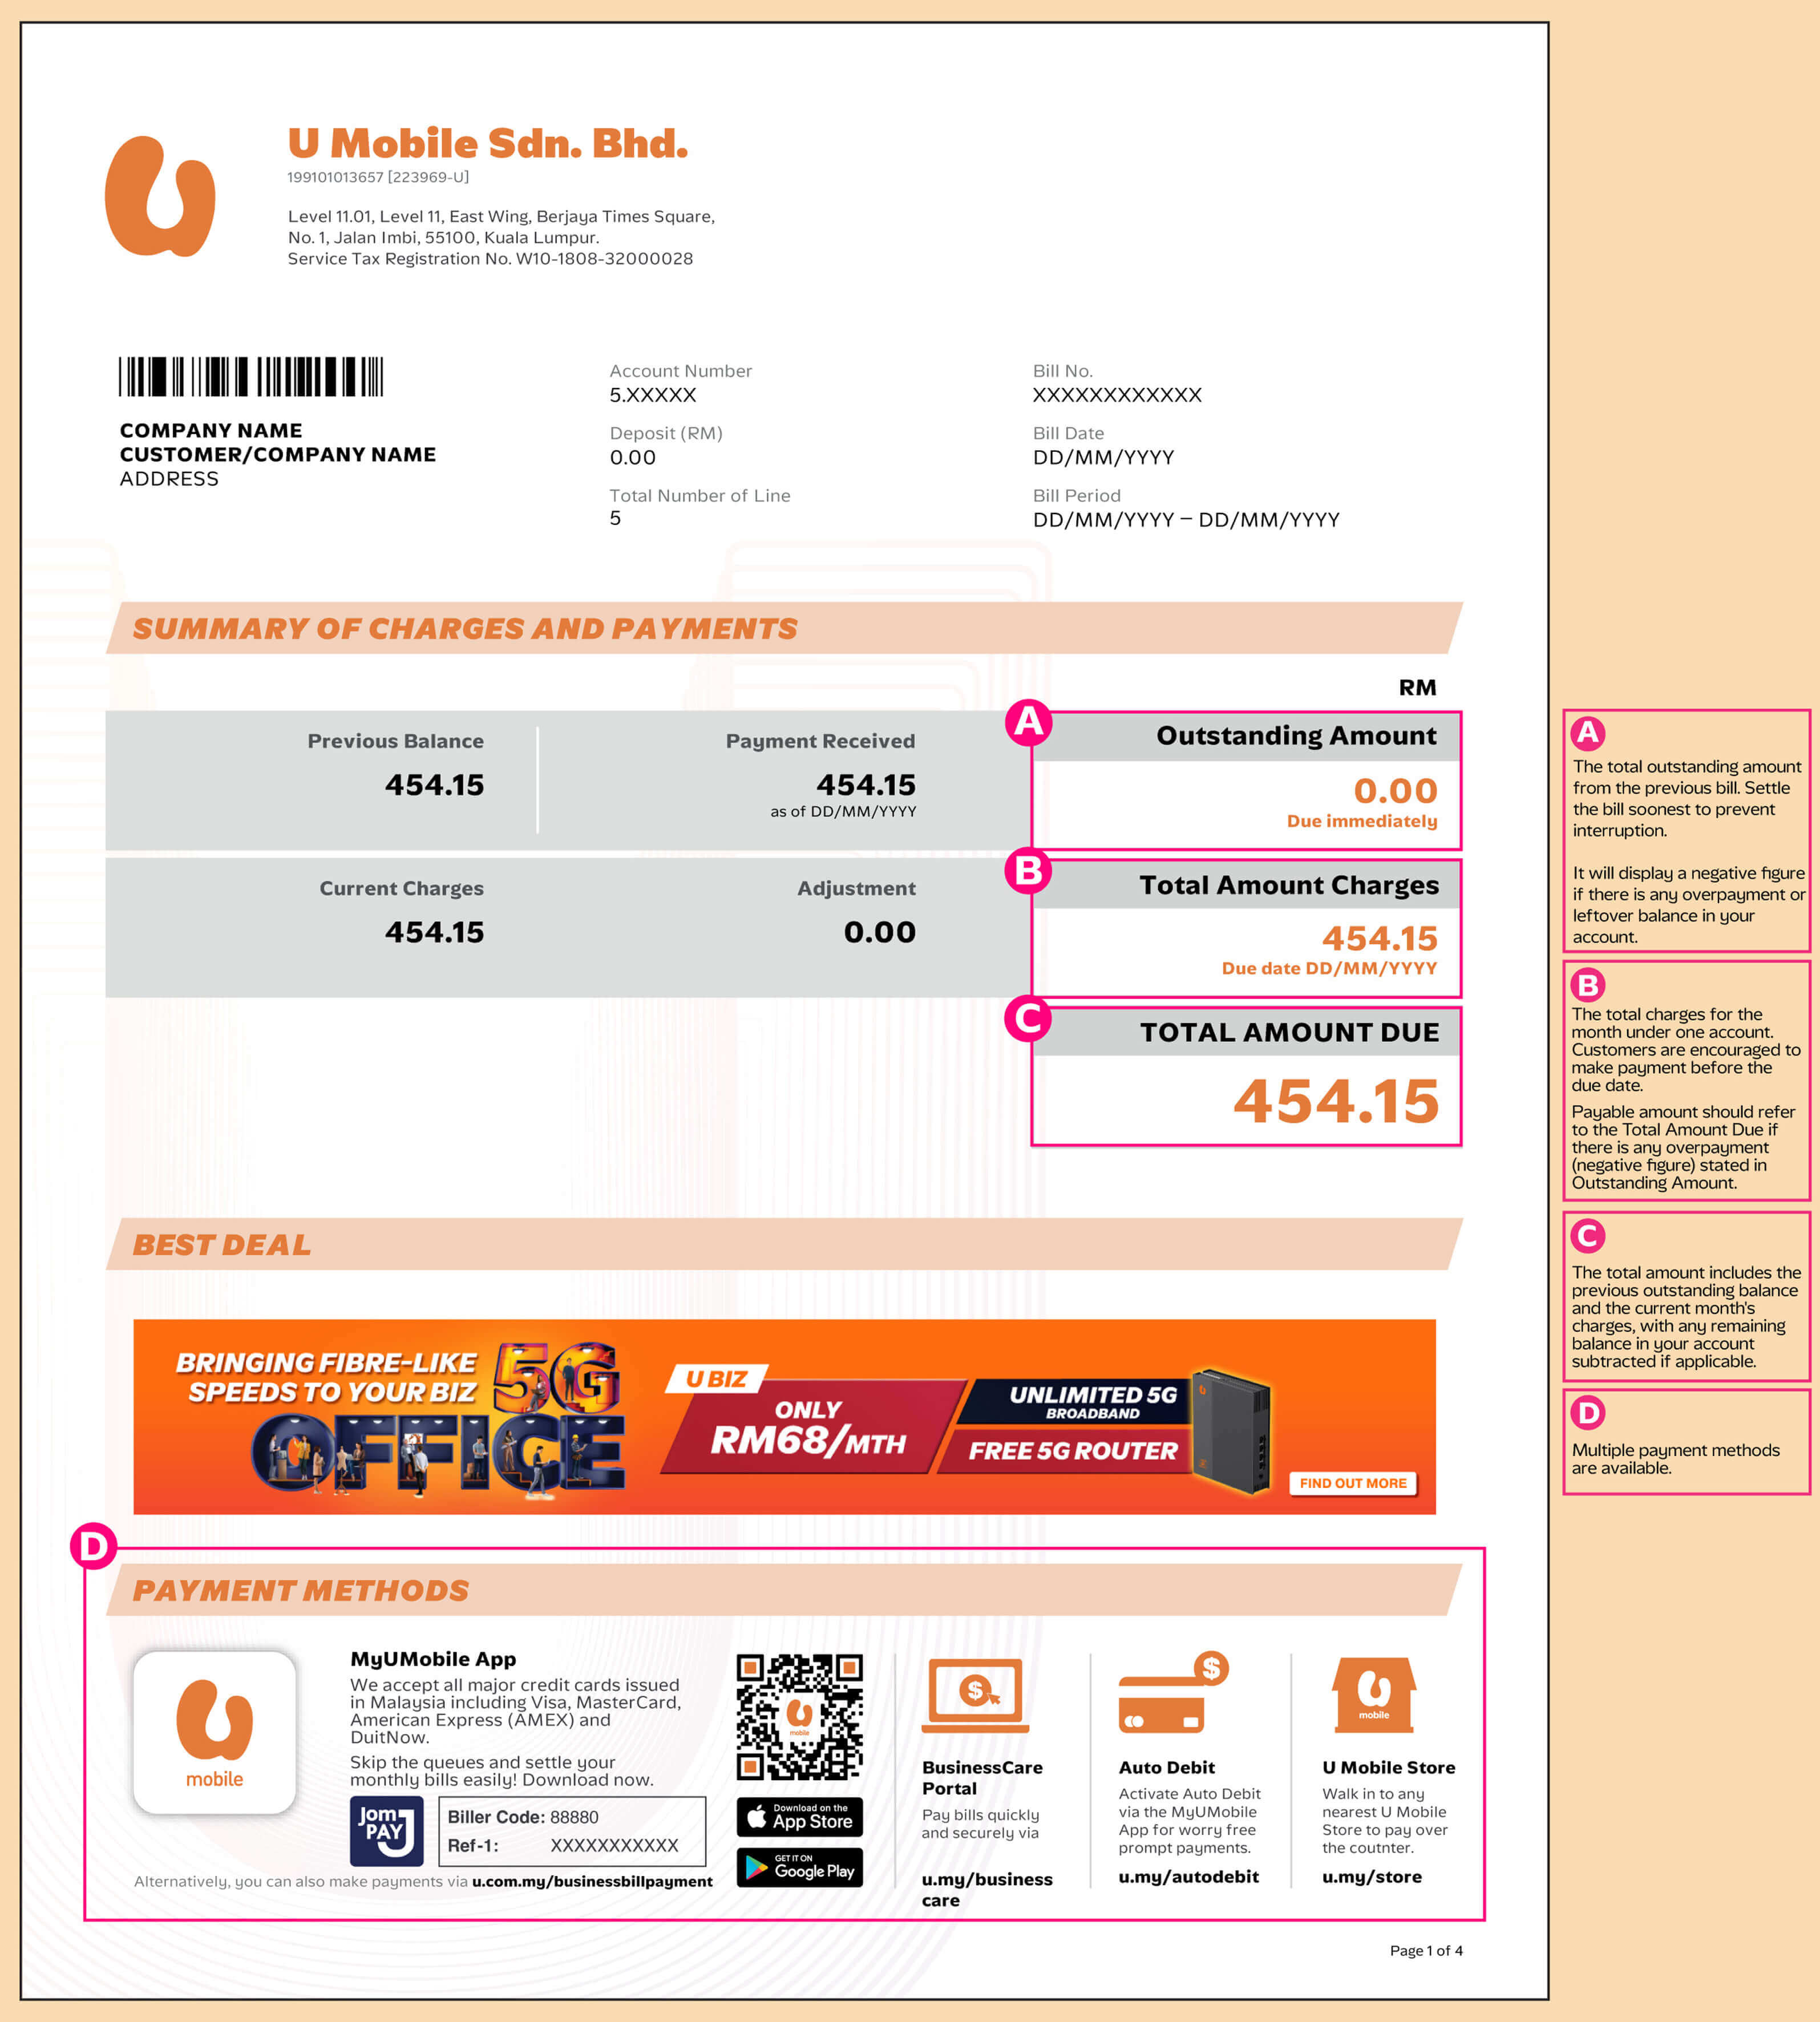
- The utility bill must clearly show your business name and business phone number.
- The phone number on the utility bill must tally exactly with the phone number you entered in Meta Business Suite (Step 6).
Click Upload and Next.
Below is an example of a utility bill showing the company name and phone number. Make sure your bill clearly displays both pieces of information.
Step 11: Enter Phone Number (If Applicable)
If you select Text Message or Phone Call as the verification method (Step 8), you will be asked to enter your business phone number.
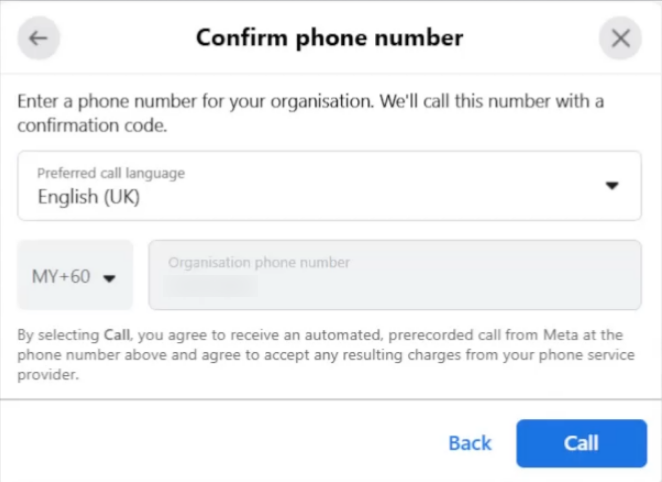
Step 12: Receive Verification Code
The verification code will be sent to your business phone number.
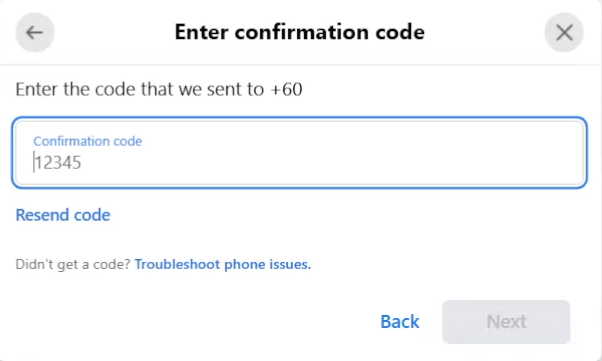
Confirm your code, then click Next.
Step 13: Wait for Review
A decision may take up to 14 working days. You'll receive a notification once the review is complete. If your business is verified, no further action is required.
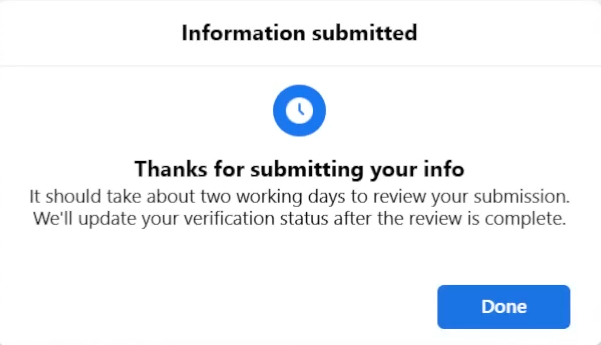
If you edit your business details, you must complete the verification process again.